AI & APIs
Getting Started with Muse Wonder
Learn what Meta Muse Wonder does, try a multimodal playground, send text and media through the API, and understand input, output, and credit billing step by step.

Muse Wonder is Meta’s multimodal reasoning model for working with mixed information, answering questions, analyzing documents, and helping with code. Meta introduced the family on October 12, 2026. Official introduction
Real work rarely arrives in one format. A task may be described in text, illustrated in a diagram, and clarified in a recording. Before using the model, you need a way to give it that material.
This tutorial starts with a small task, then walks through the model, an online playground, an API request, and the cost of a conversation.
1. Start with a concrete task
Imagine preparing a project update. You have a few progress notes, a process diagram, and a PDF proposal. You want a short explanation of what is finished, what is blocked, and what should happen next.
“Multimodal” means that the model can process different forms of information. In this example, the notes, image, and PDF are inputs. The requested summary is the output.
OpenRouter lists text, image, video, audio, and PDF inputs for Muse Wonder, with text output and a 1,048,576-token context window. Check the particular service you use for availability of inputs such as audio. Model listing
| Material | A useful question |
|---|---|
| Text notes | Extract progress, owners, and next steps |
| Image or screenshot | Explain a process, table, or interface |
| Video | Summarize events in a clip |
| Audio | Summarize the main points of a recording |
| Answer a specific question about the document |
Meta also introduced Muse Wonder Full. Its developer announcement makes Muse Wonder available through Meta Model API and Muse Code, while Full is offered through particular Muse Code subscription plans. This tutorial uses the model ID meta/muse-wonder. Developer announcement
2. Understand a request in four steps
Break the process into four small steps.
- Prepare the question and the material needed to answer it.
- Combine the text and attachments into a message.
- Send the message to the model and wait for processing.
- Read the text response and inspect input, output, and cost.
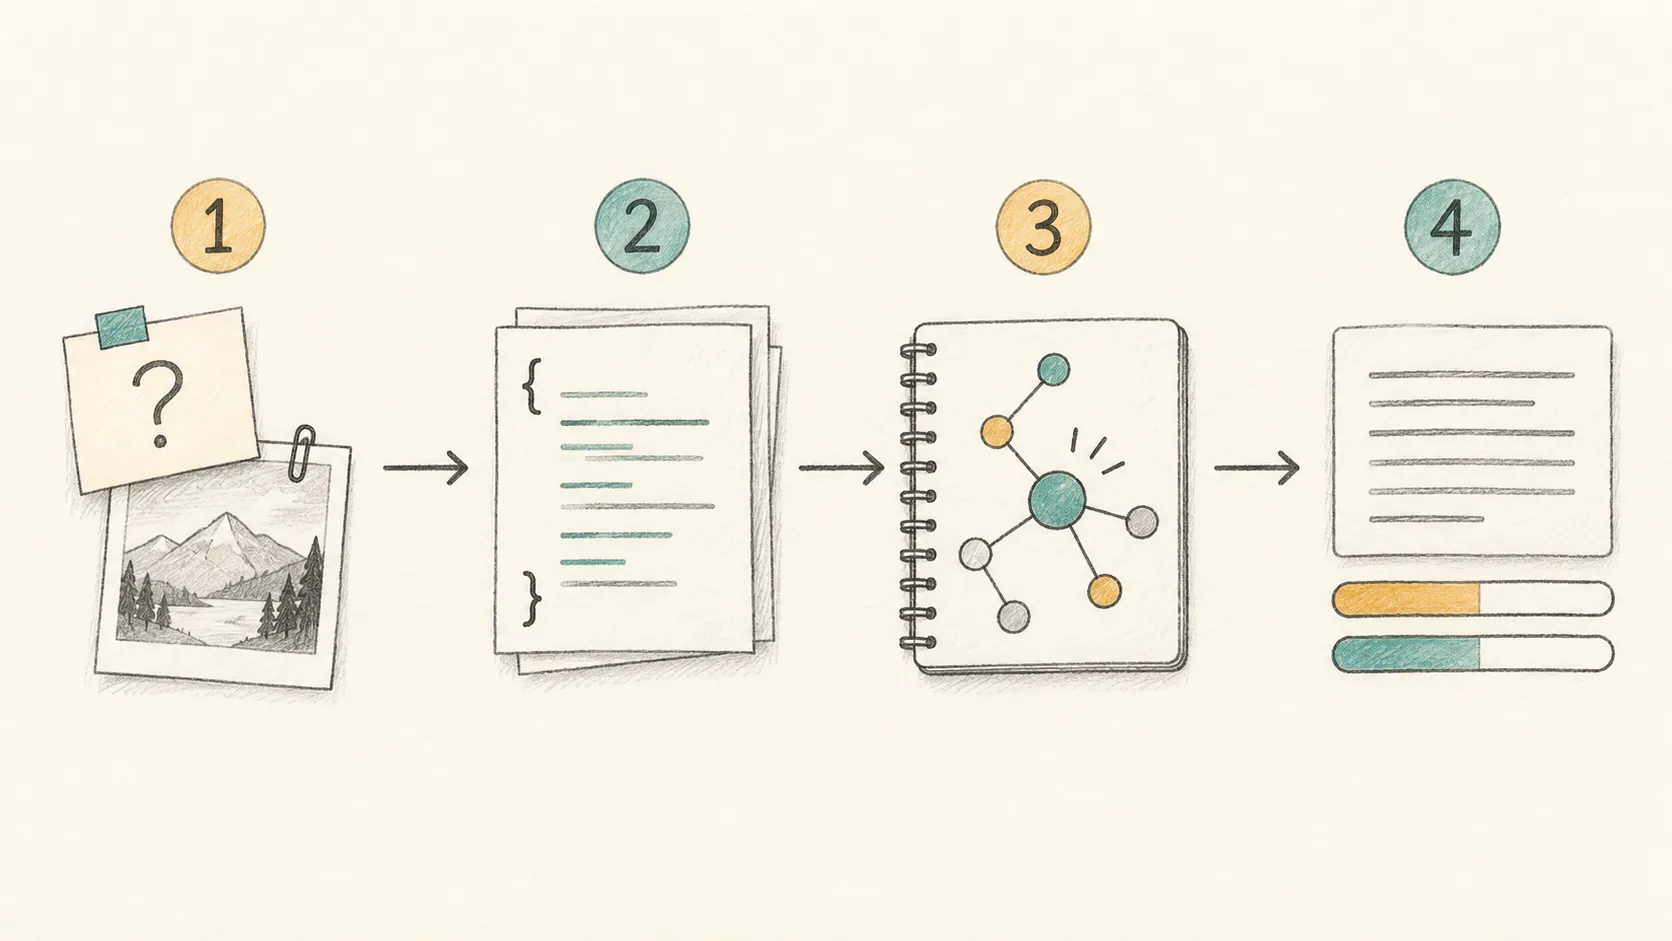
A message represents one turn in the conversation. Plain text can go directly in content. When you add an image or another medium, content becomes an array of typed parts.
That one distinction makes the API examples much easier to follow.
3. Try the online interface first
To see whether your material suits this kind of model, you can use our Decisions API multimodal playground. It brings chat, attachments, usage reporting, and API access into one product. Start with the Muse Wonder model page to check capabilities, pricing, and current limits.
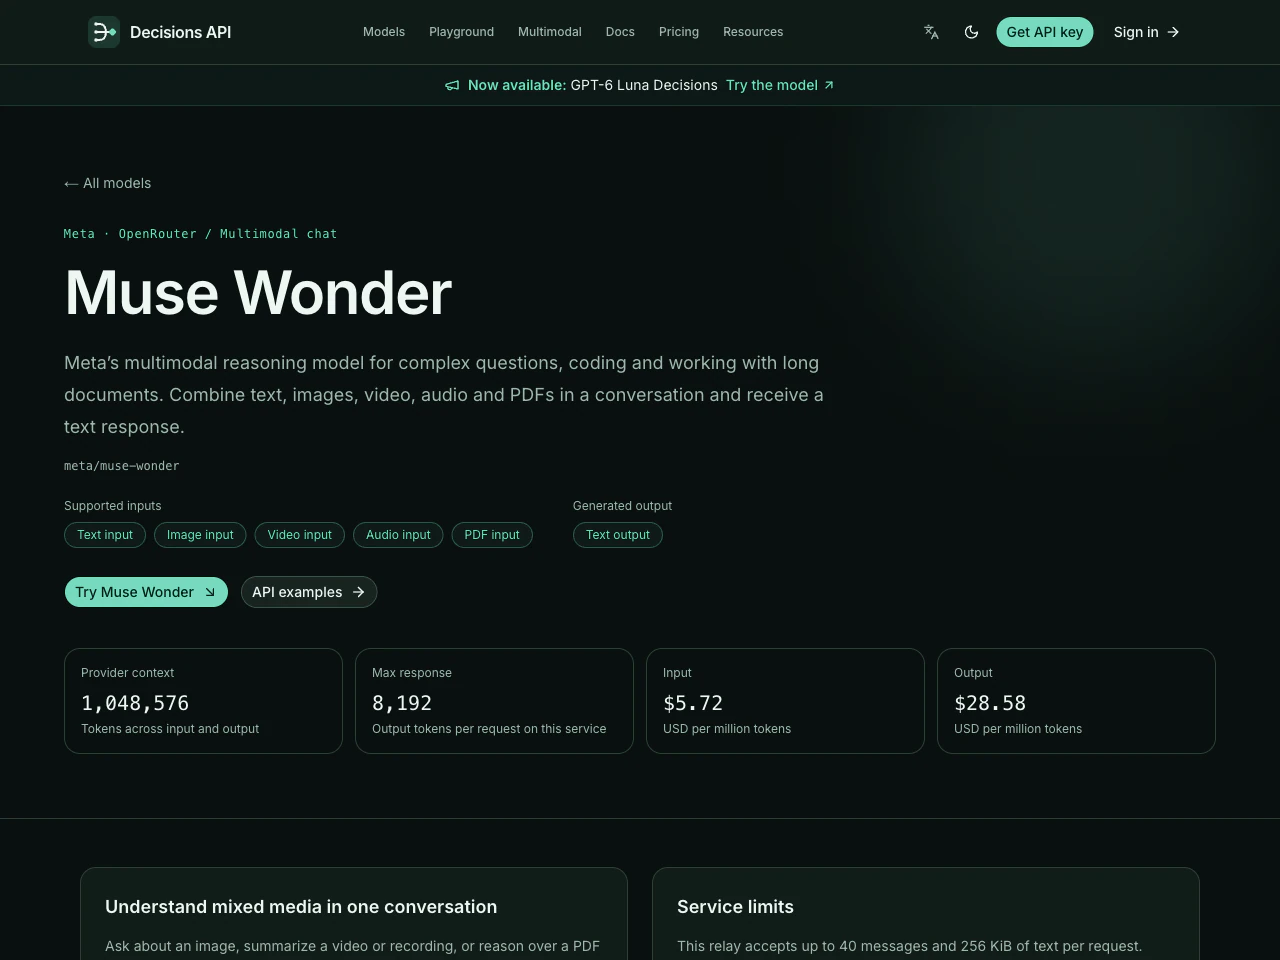
Follow this sequence.
- Sign in and make sure your account has enough credits. The service reserves a balance before sending a request.
- Begin with text. For example, provide these notes: “API finished Tuesday; integration starts Wednesday; mobile login still needs a fix.” Ask for completed work, blockers, and next steps.
- To add an image, choose “Attach media” and select a clear image. You can save this article’s conceptual cover illustration and use it as a small diagram-reading exercise.
- Ask, “Summarize the information flow in the attached diagram. List the inputs and the final output separately.” Start with a maximum output of 256, then send.
The following real interface capture stops after preparing the question and attachment, before sending the request.
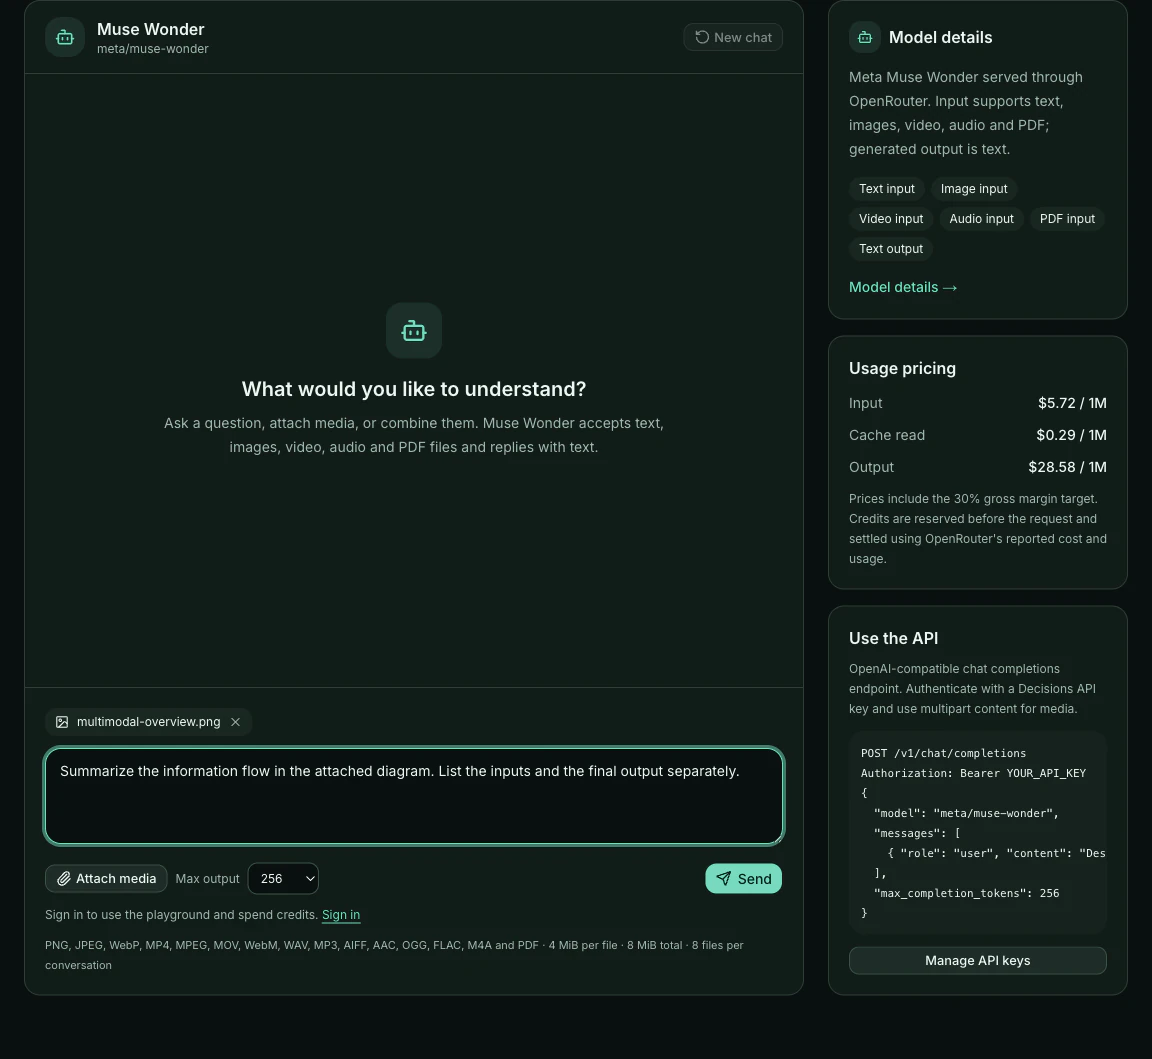
After a response, inspect the token usage and charged credits. Add a follow-up in the same conversation when you need more detail. Use “New chat” when you move to another task.
4. Send your first API message
Once the online task makes sense, connect the same task to your program. Create a key on your account’s API Keys page and store it locally in an environment variable named DECISIONS_API_KEY. Keep the key in your server environment rather than browser code.
Here is a complete text request to run in a terminal. Replace YOUR_API_KEY with the key you just created.
export DECISIONS_API_KEY='YOUR_API_KEY'

curl --fail-with-body -sS https://decisions-api.dev/v1/chat/completions \
  -H "Authorization: Bearer $DECISIONS_API_KEY" \
  -H 'Content-Type: application/json' \
  -d '{
    "model": "meta/muse-wonder",
    "messages": [{
      "role": "user",
      "content": "Project notes: API finished Tuesday; integration starts Wednesday; mobile login still needs a fix. Summarize completed work, blockers, and next steps."
    }],
    "max_completion_tokens": 256,
    "stream": false
  }'
In this request, model selects the model and messages carries your task and material. max_completion_tokens caps the output tokens for this call. The current service uses stream: false and returns the complete response at once.
This example uses this service’s key and endpoint. If you call Meta or OpenRouter directly, follow their documentation for the endpoint, key, and model name together.
5. Put media into a message
Start with an image. Keep the previous request structure and replace the user message’s content with this array.
[
  { "type": "text", "text": "Explain this diagram. List its inputs and output." },
  {
    "type": "image_url",
    "image_url": { "url": "https://img.lovableapp.org/articles/muse-wonder-guide/multimodal-overview-38f8303c04a35bfc.webp" }
  }
]
The first part asks a question. The second supplies the image. The URL points to this article’s original conceptual illustration; replace it with your own public HTTPS image URL when needed.
Other media use the same combination of a text question and a media part, with different fields.
| Input | Content type | Where the data goes |
|---|---|---|
| Image | image_url |
image_url.url: public HTTPS URL or supported data URL |
| Video | video_url |
video_url.url: public HTTPS URL or supported data URL |
| Audio | input_audio |
Base64 in input_audio.data, with an audio format |
file |
PDF name in file.filename, URL or PDF data URL in file.file_data |
For example, Python can turn a local WAV recording into an audio content part.
import base64
from pathlib import Path

audio = base64.b64encode(Path("meeting.wav").read_bytes()).decode("ascii")
part = {"type": "input_audio", "input_audio": {"data": audio, "format": "wav"}}
Here, data contains only base64 bytes, without a data: prefix. Add part to the user message’s content array, preceded by a text part that explains what to do with the recording.
OpenRouter also organizes multimodal content by type. Confirm that your chosen model and service accept the input you plan to use. Multimodal documentation
6. Read the answer and the bill
After parsing the response JSON into result, start with these fields.
console.log(result.choices[0].message.content);
console.log(result.usage.prompt_tokens, result.usage.completion_tokens);
console.log(result.credits_used, result.charged_cost_usd);
The first line reads the text answer, the second reads input and output token counts, and the third reads charged credits and their dollar amount. The last two fields are billing extensions provided by this service.
A token is a unit used to account for model input and output. It is not a fixed number of words or file bytes. Media and previous messages can both increase the actual usage of a call.
As of October 13, 2026, the rates below are in USD per million tokens. OpenRouter pricing
| Usage | Published OpenRouter rate | Displayed platform rate |
|---|---|---|
| Input | $4.00 | $5.72 |
| Cache read | $0.20 | $0.29 |
| Output | $20.00 | $28.58 |
For example, 1,000 uncached input tokens plus 200 output tokens come to approximately $0.0114 using the displayed platform rates. Settlement uses the reported upstream cost and rounds up to credits. With no extra charges, this example comes to roughly 115 credits, or $0.0115.
The initial reservation can be higher than the final charge. It covers estimated input and the allowed maximum output; settlement uses actual usage. A successful request costs at least 1 credit. Follow-up requests also carry input costs because the conversation history is sent again.
7. Keep the practical limits in view
The provider context is roughly one million tokens. This service has separate request limits: 40 messages, 256 KiB of text, and 8 attachments. Each embedded attachment can be up to 4 MiB, with an 8 MiB combined limit. A response can contain at most 8,192 output tokens.
Embedded images support PNG, JPEG, and WebP; video supports MP4, MPEG, MOV, and WebM. The playground accepts WAV, MP3, AIFF, AAC, OGG, FLAC, and M4A audio. Begin with one small file before adding more material.
Tool execution and cross-conversation memory described by Meta require supporting application logic. This relay currently handles message and media chat. Your client supplies history, and refreshing the playground clears its current conversation. Passing tools or response_format does not enable those features in the current relay.
For errors, start with the HTTP status: 401 points to sign-in or API key authentication, 402 means there are not enough credits for the reservation, and 400 calls for checking parameters or media formats. The response’s error.message gives a more specific clue.
One small task is enough to begin. Ask a clear question, supply the necessary material, set an output limit, and check the answer against the source. You can then reuse the same message structure in your own application.